Getting Started!
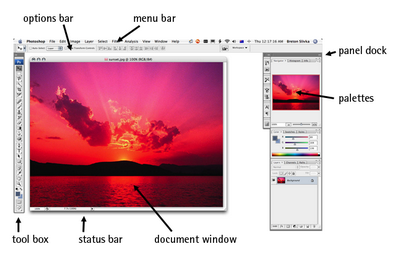
Photoshop’s “out of the box” workspace consists of the following components:
- menu bar – You will probably already be familiar with the menu bar from other programs. This runs across the top of your Photoshop window, and contains various menu options for Photoshop’s tools.
- options bar – The options bar sits beneath the menu bar and holds contextualized options for different tools. It also contains the workspace menu, where you can save and load arrangements of palettes.
- toolbox – By default, the toolbox sits to the left of your Photoshop window, and contains shortcuts to Photoshop tools.
- palettes – Individual “panes” that hold information or options for working with your file, known as palettes (or panels), float on the right-hand side. Each palette is labeled with a tab, and can be minimized, closed, grouped with other palettes, or dragged in and out of a panel dock. In the example that follows, the Navigator palette contains a thumbnail of the image that allows you to zoom in or out of the image quickly, and to change the part of the image displayed on the screen.
- document windows – Each open document has its own document window with a status bar along the bottom. The status bar sits to the right of the zoom percentage displayed in the bottom left-hand corner, and displays information that’s specific to the document.
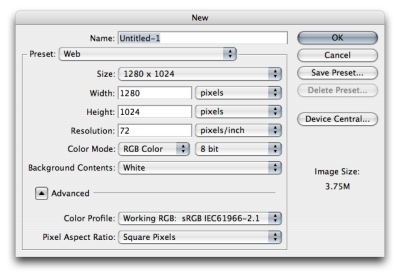
Creating Documents:
You can create a new document by selecting File > New from the menu bar, or pressing the keyboard shortcut Ctrl-N on a PC or Command-N on a Mac. The New dialog box will appear,where you can specify the document size and other settings.
Photoshop Layers:
Layers are a good feature of Photoshop that allow you to tamper with one part of the image while sparing the other.
The transparent parts of any layer, shown by the checkered grid, allow the layers beneath that layer to show through.You can show and hide each layer in an image by clicking on its corresponding eye icon in the Layers palette, as shown at the bottom of the following page.
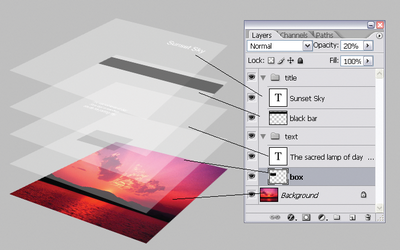
To organize your layers, you can arrange them into layer groups by going to Layer > New > Group…. Each layer group displays in the same way as any ungrouped layers on the Layers palette

Magic Wand
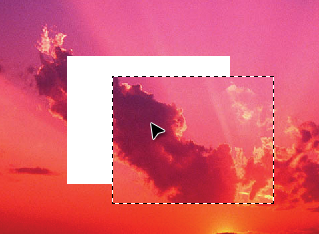
The Magic Wand Tool ![]() selects areas of similar color. You can change how close the color values should be to the sampled color in order to be selected in a Magic Wand selection, and choose whether you want the selection to have pixels that are touching or not.
selects areas of similar color. You can change how close the color values should be to the sampled color in order to be selected in a Magic Wand selection, and choose whether you want the selection to have pixels that are touching or not.
The Move Tool
The Move Tool (V) moves a selected area or an entire layer. You can invoke the Move Tool temporarily when using most other tools by holding down the Ctrl key (Command key on a Mac).
Brush Tool
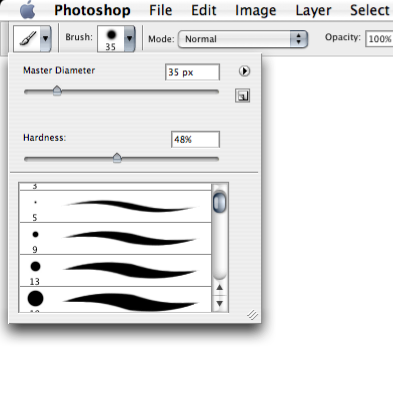
The Brush Tool (B) is suitable for soft-edged painting or drawing. Draw strokes by clicking and dragging the mouse over the canvas. You can change the brush size and other settings in the options bar at the top of the window.